Showing posts with label Orks. Show all posts

Sunday, April 11, 2010

Sculpting 202: Layering

Hello fearless readers! The last few weeks I've been finding myself returning to the part of the hobby I enjoy almost as much as playing: Sculpting. Today we're going to look at the concept of Layering.

Layering is comprised of two key concepts:
1. You don't have to do every little detail in a single go.
I consider this THE biggest tip anyone can receive when getting into Sculpting. For any sculpt more complex than a simple fill or small detail, you should build up the piece in small sections or layers. Then allow each stage to fully cure overnight before working on another. (This can be cut to about 2 hours if you use a cooker.)
Why do things in stages? Because there's few things as frustrating as getting a sculpt just right, starting on something else and accidentally obliterating or marring the first sculpt. By allowing each stage to fully solidify, you don't have to worry about an errant thumb squishing your prior work. To quote my grandfather, "If you can't take the time to do it right the first time, how do you have time to do it twice?"
So once you've finished a layer, set the piece off to the side and work on something else until the work is cured. This is a large part of why I typically have 3-6 different sculpting projects on my desk at the same time. As a bonus, doing it in layers also means you're (probably) not staring at the same fig for hours and hours!

2. It is much easier to make the outer layer look "right" when you are building onto a correctly shaped underlayer.
In the same way that armature becomes the miniature's skeleton, the underlayer is their flesh. These layers don't have to be perfectly detailed and 100% anatomically correct. After all, you're just going to be covering it up. But it is good to have the general shape and size of the muscles and flesh defined. This will greatly assist you in keeping the miniature's overall proportions and mass correct. It also makes it much easier to gauge the correct shaping for covering layer(s). This is particularly critical for clothing, but also applies to armour, jewelry, decorations and even bare flesh.
For a great example of layering and underlayers, I again recommend checking out Klaus' Ogyrn. It's an excellent example of generally defining the basic musculature and bulk before adding the final layers of clothing and armour.
Another good example is Colonel Corbane's recent Sergeant Harker conversion. For the shirt, he's used the original bare-chested sculpt for his underlayer. The cloak is also built up in several layers to achieve the correct shape and look.

To show you how a project breaks down for me, I've dusted off my photo library from when I'd first planned this article 8 months or so ago. This part of the project was specifically done to show the concept of layering in stages. Originally I meant to just put a pickelhaube helmet on an Assault on Black Reach Ork, but my muse struck and it developed into a little bit more...

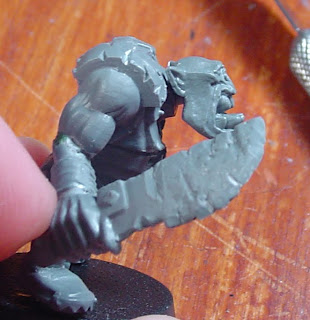
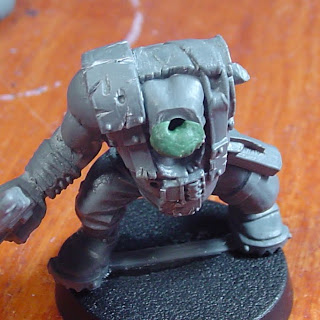
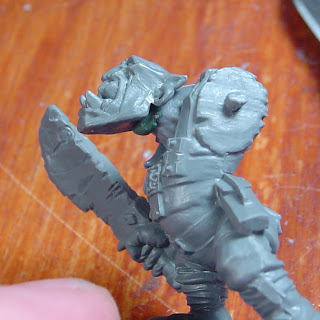
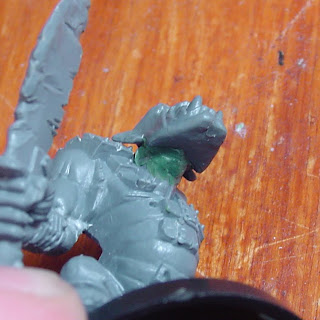
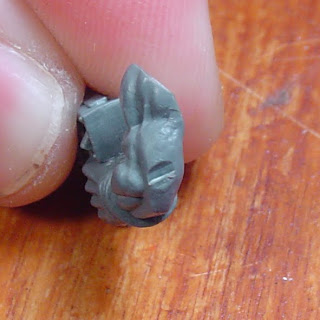
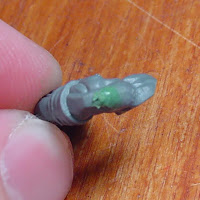
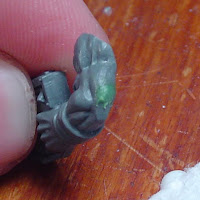
Here's what the ugly little blighter looked like to start. This was just after I'd modified his neck for the "Simple Fills" article. Note that I've stuck a length of pin into his skull to act as a basic armature and mounting point for the eventual helmet spike.Then I added my first layer of Green Stuff. I took care to get the right thickness for the dome of the helmet and smoothed the layer, but didn't bother making the edges all neat and proper.On the next application I cleaned up the edges and added the basic temple guards. There's a few tool marks here as I knew I'd be adding some more layers later. I could just as easily left them as he's just an Ork... they're not exactly known for their studious maintenance protocols.It was about this point that I realized he really needed an iron gob! So the next layer spent some time on that. Note that I only did the right side on this step; the left was added in a later step. I also added a small line of putty around the front of the helmet to start defining the brim. It didn't seem like this helmet should be "pretty", so I made sure there were some dents and scratches on the final brim.It looks like I skipped a session or two between this picture and the last. Those saw the sculpting of the left side of the gob, defining of the brim, and the addition of a rivet hinge for the gob. This shot was right after rolling out the putty for creating the helmet's crest.Once the crest was sculpted and cured, I finished him off with a spike stolen from somewhere. I think it was a Fantasy skeleton's spearhead or something...
Anyways, that's it for today. Hopefully you've gleaned something useful and/or inspiring! Cheers!

***Starter image borrowed from this site on CSS tables and randomly found via Google. As usual, it will be removed on request. The rest of the pics are mine.***

Off-topic note: Due to life, distractions and other whatnot, I promised this article "next week"... something like 8 months ago. :-p I find much more enjoyment from blogging when I write about what's on my mind at the time rather than trying to force an article. I hope you guys don't mind, but the quality seems much better when my muse is present.

Monday, August 10, 2009

Sculpting 103: Simple Fills, Forms & Repairs


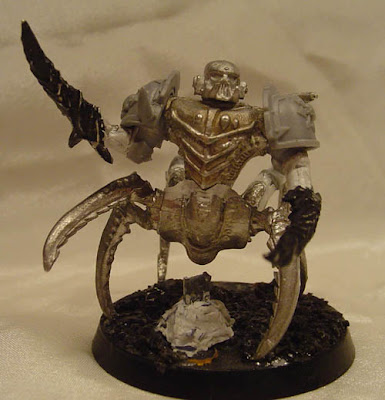
Hello everyone and welcome to another fun filled tutorial on Sculpting. For today's sample piece, we have the above Chaos Space Marine. Before anyone asks: NO THIS IS NOT A 'SARPEDON'. :-p I did this conversion before Soul Drinkers was even written. This guy was originally done up for the 3rd edition Chaos Codex to represent a Chaos Lieutenant with Daemonic Talons and Daemonic Speed. He was also my first experience with blue/white epoxy. It was such an "enjoyable" medium that I used the rest of it to fill gaps in terrain. I had to redo several pieces into Green Stuff too. Nowadays this miniature fields as a Chaos Lord with Daemon Weapon and then Steed of Slaanesh or Terminator Armour.
His abdomen and most legs are from an Epic Hunter-Screamer (also known as the RT era Carnifex), the torso is from a Phantom Titan, the arms from the metal Daemonettes, and the head and shoulder pads from Chaos Havocs.

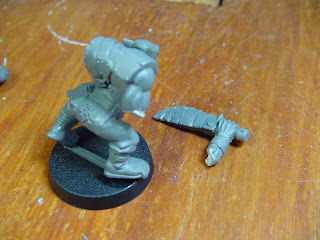
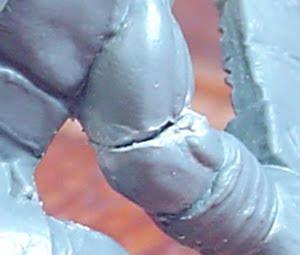
But enough of that... back to our Ork! Here Mr.Ork has been knocked from the gaming table, stepped on, played with by a 2-year old, and then had his arm broken for this tutorial too. It was not a clean break thanks to shearing torsion. The edges were ragged, twisted and had to be trimmed before he could be put back together. We could just slap him back together, knowing that glomming on the glue and paint will rarely get noticed in a field of hundreds of other Boyz. But think of the poor Ork... that's his Choppa arm. Take a long look into his beady, soul-less, piggy little eyes and ask yourself if you could really do such a thing.

So how do we fix him up right proppa? With Green Stuff! Because even an Ork knows that glue is not gap filler.

First up, we put him back together. The arm was rotated out and down a bit for look. Some trimming and cleaning of the edges was needed. I also pinned the joint for extra strength, more on this in a later tutorial. The arm was then glued into position.

A small ball of Green Stuff was mixed and rolled out. This was a LOT more than needed. However, trying to mix less than this will just end up as a blue/yellow smear across the tips of your fingers. There's a number of ways to use the excess: doing multiple repairs at the same time, filling in the slot around a Slotta Base, sculpting small decorations, base work or any other reasons you might need Sculpy.

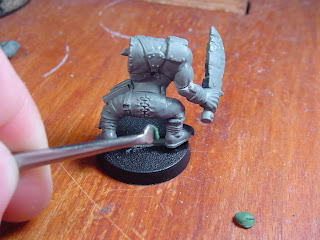
Next, use the blade of your sculpting tool to cut off a small piece of putty. If you have too little, you'll have to apply more and blend them together. If you have too much, you can work the excess away from the work area and then wipe it off the model. So it's usually better to have too much putty for the job rather than too little.

Scrape the putty off your knife so that it is generally where you want it. You will probably want to pause and wipe the blade off on a paper towel after this. A thin film or smear of putty will often adhere to the tip of your blade despite lubricant. This can build up and cause issues with smoothing and sticking. Take care of your tools and they'll take care of you.


Now flip your sculpting tool around and use the end that kinda looks like the head of a golf-club. This is your Smoother or Burnisher end. Make a guess what it's used for...
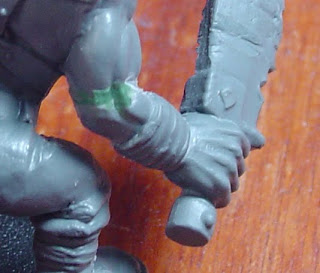
When shaping the putty, just pushing it into position is a good way to get it to stick to your sculpting tool. Instead, you want to use gentle sweeps of the smoother almost perpendicular to the crack to "draw" the putty down the line.
It is also easist to start in the center of the gap and shape the putty towards the ends. This will spread the putty more evenly and reduces the amount of cleanup needed along the edges.
When smoothing the putty, especially when thinning it at an edge or juncture, use a tight swirling motion to "polish" the putty down to shape.
The nicest thing about a small fill like this is that it is easy to follow the shapes of the original model. The plastic of the model will usually keep you from pressing in too deep and will guide your sculptwork.
As another note, I recommend starting out with organic models like Orks, Chaos or Tyranids... they are a little more forgiving towards small mistakes of shape, size, and smoothness.

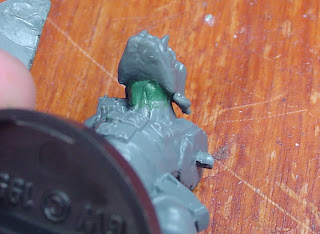
Now let's turn our eyes to a slightly more complex fill. The original model is looking at the ground maybe 5 meters in front of him. I wanted a model that was looking across the field at the enemy. Raising the neck like this caused quite a sizeable gap. So it was Green Stuff to the rescue again! It's almost like I'd planned this for a tutorial or something...

After fitting the two pieces to get an idea of how much putty I would need, I smooshed a glob of it into the neck area.

A bit of glue was then applied to the end of the head stem and it was pushed into place.

Using the same smoothing techniques as in a simple fill, the putty was worked from the center to the edges. A big thing to be aware of with this kind of fill: you're not working against as solid a backing. Newtonian physics applies and a strong push in from the left will cause putty to displace out the right. This is why you want to work gently and with oblique pressure.

Once the smooth shape of the neck was completed, a little more detail work was needed to pick out the throat muscles and larynx. I simply aligned the curve of the sculpting tool against the extant ligamenture, about 1.5mm down from the tip. The blade was canted at an angle and rocked into the sculpy, drawing down to create the lines going into the orgininal sculpt. The edge of the burnishing tool was then used to smooth and round the shaping and join. (Yes, I'm so OCD as to have sculpted details on the bottom of an Ork's neck...) A little more smoothing was also done to the sides of the neck and then the sculpt left to cure.

And this leads us to our third example... a simple raised form. This is where you're not really filling a gap between parts, but instead building up to repair a small detail that was miscast, clipped off the sprue poorly, chopped by an errant knife or otherwise mangled.
The trick with this repair is that it uses a very small amount of Green Stuff. Epoxy bonds to other epoxy very well, but not so much to plastic or metal in small amounts. There needs to be a decent amount surface area to adhere too, lest the finished product just flake off after curing.

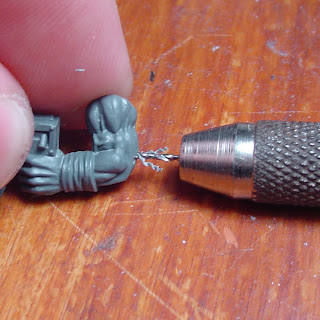
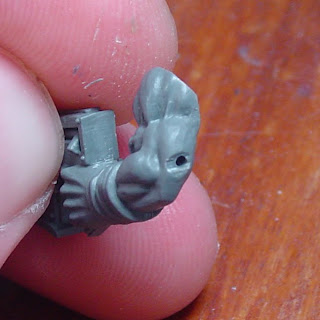
The solution is simple: a pin drill. The hole doesn't need to be that deep, only a millimeter or three.


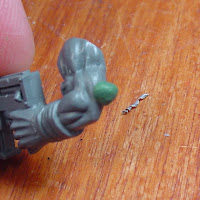
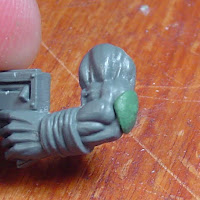
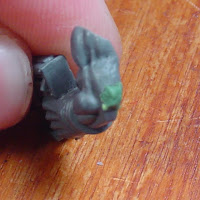
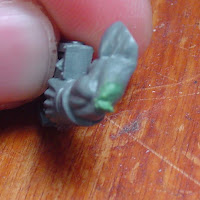
Now place a large ball of putty on the area. (Figure 1) Press it down slowly but firmly to fill into the hole. (Figure 2) Then use the blade edge of your tool to trim the excess away from the area. (Figure 3) Do this by pushing the edge into the putty to cut it and then scraping away from the center mass. You will want to make sure your blade is well lubricated so that you don't accidentally pull the putty off during this. The final result should be a rhombus in the general shape and quantity needed.

A raised fill is trickier than a recessed fill because you don't have the edges of the gap to keep you from pushing too far in. Put too much pressure on a raised feature and you'll just smoosh the whole thing flat. With the semi-solid nature of putty, trying to push a feature back up is often a frustration of creases, folds, slippage and bad words. It will often be easier to just wipe the putty off and apply a fresh ball. To avoid this, just use the same draw and burnishing techniques as above... with more care for depth.


The big thing this changes is where you start your sculpt from. You can start from the depths and push everything up to higher areas... have fun with that. Or you can start from the highest points and draw the putty down to where you need. (Figure 1) Any excess putty gets worked down and away from the main sculpt. (Figure 2) Once you have it sufficiently thinned, you can scrape it off the model. (Figure 3) Any loose ends or scrape marks can then be burnished smooth.

Whew... made it all this way or did you just skim? :-p Hopefully this has been an interesting and informative tutorial. Next Week: "Sculpting 201: Pinning, Armature, and Large Shapes". Cheers!

Wednesday, August 5, 2009

Sculpting 102: Putty

I liked the look of the last post so much that I've decided to start each post tutorial with a finished fig that I've sculpted on. The pic above is of the exact same basic Assault on Black Reach Ork Boy. The one on the left is unmodified and straight off the sprue. The one on the right is what happens when I start feeling "creative". You'll be seeing the guy on the right quite a bit as we progress. He is my demonstration piece for several of the techniques I'll be covering. Someday I may even paint him...

Now if you've spent any time in a hobby store or surfing the net regarding sculpting, you've heard of Green Stuff. This is the bread and butter of the sculpting world, also known as Kneadatite Yellow/Blue Epoxy. Want to see the power of re-branded markup? Take a look around at the price difference using that name instead.

But before you buy, there's some thing worth noting here: the edges of the two colors are joined. This is for a substance that you activate by mixing. Unless you're desperate and in need of a quick putty fix, don't buy tape putty! Why? Because the epoxy will have started mixing along that contact point. The putty for about 1mm on each side of the join will still be trash, even straight from the manufacturer. Older putty will be even worse. You can tell it has been on the shelf too long as the yellow side will develop a definite green tint compared to fresh epoxy. But rather than hunt for the freshest of fresh, there's an easier solution: buy seperately packaged block or tube putty. These will come in a larger quantity, but the price will usually reflect buying bulk. For this you'll get a much better initial quality and raw putty lifespan. My current supplier of choice is Gale Force 9.

As an alternative to Green Stuff, it is worth noting Procreate's Grey Stuff. It is also available from Gale Force 9 in separate tubes. The difference between the two? Grey Stuff's pretty new on the market so there aren't as many tutorials using it. It's a little less sticky and forms sharp edges quite nicely. It's also softer, easier to make mistakes with, and harder to learn how to form. Green Stuff rounds easier and better lends itself to organic or soft forms. The higher contrast of color also makes it easier to see against plastic or metal figs. If you're just starting out, then I'd steer you towards Green Stuff. If you've already done some Green Stuff and are looking to do something more advanced, try Grey Stuff.

Now that you have your epoxy of choice, let's talk "care & feeding". As unmixed epoxy ages, it will start to swell. You can see this in the older tape epoxies on the shelf... anywhere the tape is bent you can observe a slight puffiness to the creases. If it's really old (1 year+), you might even see where it has puffed out past the plastic sheathing at the cut ends. You might say, "So what? I'll be smoothing it out when I sculpt." The thing is, epoxy that's swelling in the wrapper will also swell when applied to the fig. This might not be an issue if you're sculpting something lewd and Slaaneshi, but your Space Marine Commander's face will look like he's allergic to bees. The biggest causes of this aging are heat, dryness and oxidation. So just keep your putty cold, moist and out of the air! Cut your block up into smaller chunks, put these in a plastic baggie and FREEZE THEM! Your putty can keep "like new" freshness for several years like this.

Now typically you'll want a 50/50 mix of putty. More blue will make the final epoxy harder but the sculpt will also cure faster. More yellow will allow a longer working time or softer/smoother pieces, but will also take longer to cure. If you really want to get fancy, you can also mix in some Brown Stuff or other epoxy. Green Stuff and Grey Stuff can be a bit bendy and tear it torqued. The extra rigidity of mixing in Brown Stuff also makes it easier to sculpt and retain sharp edges or points.

Now you've got your putty and idea for something to sculpt... let's mix some putty. First, cut off two pieces of putty of the approximate total volume you think you will need. Invariably, this will always be about half again to twice what you actually need. Excess can be used to fill in bases or create decorations.
Roll the two pieces out into thin tubes and then twist or braid them together.
Put a bit of your lubricant of choice on your forefinger and thumb, as from here on out the putty will be very sticky until dried. Smash your little braid flat, twisting and mixing like taffy. It shouldn't take very long before you can squish it flat and observe a smooth and even color. At this point I'll usually roll it into a small ball to reduce surface area and slow the curing process. (Note that the 3rd picture is just the initial squish. The putty is NOT well mixed at this point and should be worked more until you have an even color.)

For some additional links on putty epoxy, I'd suggest the following resources:
Warpshadow's Putty & Clay page. (Horrid colors/design, but great info.)
James Van Schaik's excellent putty reviews: Brown Stuff, Green Stuff, Grey Stuff. (I almost don't want to link him as he does this stuff professionally...) :-p

Cheers and hope you have enjoyed this installment. Next week: "Sculpting 103: Simple Fills, Forms & Repairs".