Friday, August 28, 2009

Falcon versus Wave Serpent: The Math

Hey there folks.

So Fritz over at Saim-Hann put out a post wondering which is more survivable, a Falcon or a Serpent. Having done the math-hammer in the past... my answer is that the Falcon's more survivable in a stand-off role while the Serpent's a better assault boat.
Serpents are less likely to be killed by melta, Demolishers and when Moving Fast.
Falcons are equally or more likely to be damaged in other cases, but also more likely to survive the results.

5th edition has really become the heyday of mechanized armies. With this, there's been a subsequent rise in melta too. So my general rule is that Falcons sit in the back and play DAVU tactics while Serpents are used to Transport anything that wants to get close.

This is just a general rule as the math does not include BS to-hit, cover, Fortune, Tank Hunters or other exotic situations. I also don't factor for rear-armour shots; this is both implausible to fairly calculate and I figure you're getting your just desserts if that happens. So all shots are considered to have already hit, the target is in the open, it is against AV12, and the Serpent Field is on. Here's the maths:
Wave Serpent Shaken Stunned Weapon D. Immobilized Wrecked Explodes
S6 8.33% 2.78% 2.78% 2.78% 0.00% 0.00%
S7 11.11% 5.56% 5.56% 5.56% 2.78% 2.78%
S8 13.89% 8.33% 8.33% 8.33% 5.56% 5.56%
S9 13.89% 8.33% 8.33% 8.33% 5.56% 5.56%
S10 13.89% 8.33% 8.33% 8.33% 5.56% 5.56%
S8 Ordnance 13.89% 8.33% 8.33% 8.33% 5.56% 5.56%
S10 Ordnance 13.89% 8.33% 8.33% 8.33% 5.56% 5.56%
S10 AP1 5.56% 8.33% 8.33% 8.33% 8.33% 11.11%
S10 AP1 Ord. 5.56% 8.33% 8.33% 8.33% 8.33% 11.11%
S8 AP1 5.56% 8.33% 8.33% 8.33% 8.33% 11.11%
S8 AP1 Melta 13.89% 8.33% 8.33% 8.33% 5.56% 5.56%
This is the chance per shot for a Wave Serpent to take a certain type of damage.
Or in graphical form:

Wave Serpent Sum Damage Dead Norm Dead SMF
S6 16.67% 0.00% 1.39%
S7 33.33% 5.56% 5.56%
S8 50.00% 11.11% 9.72%
S9 50.00% 11.11% 9.72%
S10 50.00% 11.11% 9.72%
S8 Ordnance 50.00% 11.11% 9.72%
S10 Ordnance 50.00% 11.11% 9.72%
S10 AP1 50.00% 19.44% 13.89%
S10 AP1 Ord. 50.00% 19.44% 13.89%
S8 AP1 50.00% 19.44% 13.89%
S8 AP1 Melta 50.00% 11.11% 9.72%
This is a Serpent's total chance to take damage and risk of being destroyed.

Falcon Shaken Stunned Weapon D. Immobilized Wrecked Explodes
S6 12.50% 2.31% 1.39% 0.46% 0.00% 0.00%
S7 17.59% 6.48% 4.63% 2.78% 1.39% 0.46%
S8 22.69% 10.65% 7.87% 5.09% 2.78% 0.93%
S9 27.78% 14.81% 11.11% 7.41% 4.17% 1.39%
S10 32.87% 18.98% 14.35% 9.72% 5.56% 1.85%
S8 Ordnance 31.56% 16.59% 12.42% 8.26% 4.63% 1.54%
S10 Ordnance 33.41% 23.38% 17.98% 12.58% 7.41% 2.47%
S10 AP1 9.26% 23.61% 18.98% 14.35% 9.72% 7.41%
S10 AP1 Ord. 4.63% 28.78% 23.38% 17.98% 12.58% 9.88%
S8 AP1 9.26% 13.43% 10.65% 7.87% 5.09% 3.70%
S8 AP1 Melta 4.63% 27.08% 21.99% 16.90% 11.81% 9.26%
This is the chance for a Falcon to take a certain type of damage.
In graphical form:

Falcon Sum Damage Dead Norm Dead SMF
S6 16.67% 0.00% 0.23%
S7 33.33% 1.85% 2.32%
S8 50.00% 3.70% 4.40%
S9 66.67% 5.56% 6.48%
S10 83.33% 7.41% 8.57%
S8 Ordnance 75.00% 6.17% 7.22%
S10 Ordnance 97.22% 9.88% 11.23%
S10 AP1 83.33% 17.13% 15.74%
S10 AP1 Ord. 97.22% 22.45% 20.22%
S8 AP1 50.00% 8.80% 8.34%
S8 AP1 Melta 91.67% 21.06% 18.98%
This is the Falcon's total chance to take damage and risk of being destroyed.

Falcon vs Serpent Shaken Stunned Weapon D. Immobilized Wrecked Explodes
S6 1.5 0.83 0.5 0.17 N/A
N/A
S7 1.58 1.17 0.83 0.5 0.5 0.17
S8 1.63 1.28 0.94 0.61 0.5 0.17
S9 2 1.78 1.33 0.89 0.75 0.25
S10 2.37 2.28 1.72 1.17 1 0.33
S8 Ordnance 2.27 1.99 1.49 0.99 0.83 0.28
S10 Ordnance 2.41 2.81 2.16 1.51 1.33 0.44
S10 AP1 1.67 2.83 2.28 1.72 1.17 0.67
S10 AP1 Ord. 0.83 3.45 2.81 2.16 1.51 0.89
S8 AP1 1.67 1.61 1.28 0.94 0.61 0.33
S8 AP1 Melta 0.33 3.25 2.64 2.03 2.13 1.67
This is a risk assessment comparison of the Falcon versus the Serpent, broken down by type of damage.

Falcon vs Serpent Sum Damage Dead Norm Dead SMF
S6 1 N/A
0.17
S7 1 0.33 0.42
S8 1 0.33 0.45
S9 1.33 0.5 0.67
S10 1.67 0.67 0.88
S8 Ordnance 1.5 0.56 0.74
S10 Ordnance 1.94 0.89 1.15
S10 AP1 1.67 0.88 1.13
S10 AP1 Ord. 1.94 1.15 1.46
S8 AP1 1 0.45 0.60
S8 AP1 Melta 1.83 1.9 1.95
The numbers above are a risk assessment of the Falcon vs the Wave Serpent for total chance of damage and being destroyed.

For the risk assessments, the number given is roughly how many times more likely a HoloFalcon is to get a result compared to a Wave Serpent.
A value of 1 means the two tanks are equally likely to get this result.
A value greater than 1 favors the Wave Serpent.
A value less than 1 favors the Falcon.


And here's a side-by side of their survivability based upon movement.

*Image borrowed from the good Master DarkSol's Photobucket.

Tuesday, August 18, 2009

Sculpting 201: Pinning, Armature, and Large Shapes

Here we go again with another foray into learning to sculpt! You've seen the basics of sculptwork, but what if you want something that doesn't follow the shape of the original sculpt? Something that's not just a repair, but instead a little larger, a little more complex, a little more personalized? For this you need to step beyond the basics and into the intermediates. Wait! Don't run away! It's really not that difficult! Plus, I promise the bleeding will stop sooner than you'd expect...

Now one trick is that you're going to be making larger gaps between your original pieces. Putty is naturally a little flexible and will tear under stress. Even normal game play can cause this and it's even worse if you drop the fig or try traveling anywhere. It's foolish to rely on the putty to hold up by itself, especially on a model with metal pieces. The solution is simple: the humble pin drill.

What is a pin drill? Simply, a hand cranked drill for working with really small drill bits. Games Workshop has a decent one with silicone pads and 6x 1mm bits. Because I believe in the open market system, here's similar items from Ace Hardware, Gale Force 9, or Ehobby Tools.
Now I can't really point at one version or another and say "that is the best for everyone". You need to find the one that's right for you. But here's a few tips I can give on things to look for:
1. A swivel plate. This is the flare, knob, or pad at the base of the vise. A deep drill, hard metal or dull bit can require a bit of force to drill. The swivel plate allows you to push down the length of the drill with your palm or the base of your fingers. This takes strain and pressure off your finger tips. But even better, it gives you a firmer grip on the whole system, letting you focus on details like alignment and turning the drill. It's for this reason I recommend against the "Double Ended" version shown on Ehobby... long use can be painful.
2. Size. There's a bit of variance in the design of pin drills. Different makes have different lengths, circumference, or positioning of the pads. This is why I strongly recommend picking one up in person to get a feel for it. For example, the GW version just doesn't work for me because of where the pads are placed... it's designed for someone with smaller hands than my mitts.
3. Collets and bits. A collet is the technical term for the part of the vise that compresses to hold the bit in place. Simple systems like GW's have a limited collet and are designed for a very small tolerance of drill bits. Others will have 2 or 4 collet systems that allow a greater variance in bits. In the same sense, also take note of how many bits you get and how big they are. You WILL break bits. I tend to go through them almost as often as I do Xacto blades. A pro to the GW set is that you get 6x bits. A con is that they're all 1mm; which doesn't do you much good if you really need a .75mm.

So now that I've bored you to death with pin drills, you might be wondering why a drill will matter. It's easy and yet another great technical term... for making your armature.
Armature: Sculpture. a skeletal framework built as a support on which a clay, wax, or plaster figure is constructed.
Now if you're building an entire fig from scratch, then your armature can be built and sculpted over. But if you're modifying an extant mini, you'll need to build on into that. This is why a pin drill is so important. Other tools like a clamp, chisel blade knife, mini-saw, files, and other tools are nice... but only a pin drill can create the smooth bore you need for proper pinning and armature.

Simply, armature is the skeletal structure on which you build. It gives rigidity to the piece, allows you to get a sense for basic form and anatomy, defines your simple proportion, and gives you something to hang the putty on. Some people like staples or paper clips. Personally, I use sewing and quilting pins. Note: pins, not needles. Needles are made with a higher temper steel, so they're stronger and more firm but they also tend to snap rather than bend. Sewing pins provide the right amount of strength, rigidity, and poseability for what I like to do.

So the first step is simply to drill a hole into the fig at the place where the bone or other base framework should be. Then glue your pin in place. Bend it to the shape desired. The excess can be cut off, but sometimes it's nice to have it there to mount the fig for sculpting, painting or basing. If you're unsure, hold off... it's always easier to remove than to add back on.

Now that you have the basic skeleton of the piece ready, you can add basic "filler" mass to create your larger core shapes. This is technically more of the armature as you're just sketching out the basic shapes. It can be more metal, glue, putty or other filler material to bulk out the fig. Brown Stuff and other hard epoxies are great for this. You're not worried about detail here, so much as getting a basic shape on the fig against which details can be formed. Just remember that this layer should be slightly recessed from your final layer, that way you're not having to add more putty to blend the seams. For a great example on armature and building up on it, go check out Klaus' Dei Greci site. In particular there's this, this, and this post from his Ogryn in the armature stages.

One more thing to point out here is that you can always change your armature. Just note that it is easier to do this early rather than later. And as a last item, it's perfectly acceptable to drill entirely through a bit and mount it in the middle of an armature. Both of these methods can be seen on my Chaos lieutenant's legs, the left being the "before" test phase and the right being the final.

That's it for this time... Next week: "Sculpting 202: Layering" Hope you've enjoyed the show!

Friday, August 14, 2009

Ard Boyz Round 2, Battle 2

Neither my first nor third battles were that tactically interesting. The details are a bit hazy, but they were basically bum-rushing, late game objective grabs and generally un-challenging and boring.

But the SECOND game... oh, that was a good one. Makes me want to travel out to El Paso sometime to return the favor...

I drew Zeus (short for Jesus) and his very nasty Khorne Daemons army. Ironically, right before the pairings a friend of mine was telling me about the list and just how brutal it was. (Ian and his Sisters didn't face Zeus, but was on a table next to him the first game.) I made a crack about how it would be just my luck and that I'd pull that army for the second battle...

As a note, this is just a reconstruction from memory. Some specifics of positioning or wounds caused may not be perfectly accurate... but should be correct enough to show what happened. If something looks to have moved too far, this is purely a fault of the reconstruction.

To save you back-tracking on what's what:
My List: Eldrad w 10-man Council in Yellow Serpent, Farseer w 8-man Council in Yellow Serpent, 2x6 Dragons in Red Serpents, 1x10 Banshees in Green Serpent, 1x10 Fire Storm Guardians w Destructor Warlock in Black Serpent, 3x Guardian Jetbikes, 1x DAVU Falcon w Scatter Laser turret, 3x Scatter Laser War Walkers.
His List: 2x Blood Thirsters, 3x7 Blood Crushers, 4x13 Blood Letters, 1x Soul Grinder, 1x Khorne Daemon Prince.

Another interesting thing about this tourney: the terrain fairy was on strike. The store had stacks of terrain on the walls, but almost every table had crap for cover. This was actually one of the "better" boards in that it had 5 pieces, though most were near useless with how they were positioned. The board looked generally like this:The two round sections were craters and the ruins were all Cities of Death single-story with very open LOS through them. If you look to the right of the board: his Wave 1 was the top selection of Thirsters, Crushers and Soul Grinder. His Wave 2 was the Letters and Prince.

TURN 1: Zeus won the roll for turn choice and decided to go first. I think he was worried about getting guys on the board as fast as possible. I put everything into Dawn of War Reserves, except the Jetbikes which went into normal Reserves. He rolled for his Wave... and got a 2! Then I got a second lucky break: his Daemon Prince deviated 10" back to land 1/2" off the board and kill himself with a Deep Strike Mishap! Neither of these two items was THAT critical to the game, but certainly helped alleviate the pressure early on.He went heavy left, obviously hoping to draw me over there and away from the mass of objectives.

For my turn, I obliged moved on at the left. I knew my mobility could get me to the objectives when needed. I also knew I'd need to concentrate my fire and eliminate entire squads as fast as possible to avoid getting bogged down in close combat. I had some nice Night Fight rolls and blasted a few Letters that had strayed into my sights. Knowing he had a bunch more Daemons to drop in, I castled up my forces to keep him from Deep Striking into the middle of them.In retrospect, this probably wouldn't have mattered since I had the speed to get away... but I wanted him thinking I was afraid of his assaults and going more shooty.

TURN 2: At the start of this turn the first objective went live... right between our forces. Ouch... especially when a unit of Crushers and a Thirster dropped on top of it. This pretty much decided where the main engagement would be. The Soul Grinder also dropped in and popped a War Walker (Immobilized) while the Letters on the left all backed off to avoid my guns.

Soul Grinder, meet Fire Dragons. Two Weapon Destroyed and an Immobilized meant it wasn't dead, but wasn't a threat either. Since this opponent wasn't shooty, both Councils Fortuned themselves rather than their rides; moving up to face the right flank threat. A nice round of Falcon and Serpent shooting also dropped a bunch of Letters. Then a bunch of fire also went into the Crushers and Thirster, but Night Fight and saves kept the wounds to a minimum and spread about the unit.

TURN 3: Shock, horror and surprise... a Khorne list opted to charge! All he could get was Crushers into the Council Serpents. Sadly, his attacks worked as expected and managed to drop both Serpents. However, they were both Penetrating 5's... and Destroyed results don't hurt passengers.

Neither Council was Pinned, so the scrum REALLY started. Eldar charged Khorne! Hah. My opponent confessed he thought I was insane... but then he learned what Seer Councils can do. He was nicely bunched up for Destructors. Add on a nice charge and the were Crushers hurting for little damage to the Councils. The Dragons finished off the Soul Grinder and Night Fight suppressed most everything else that was interesting.

TURN 4: Here the second objective went live... right in the middle of his forces. Bah! It was time for his retribution too, with the Thirster and a squad of Letters jumping into the scrum. Fortuned Saves kept the Thirster from doing anything and Doom kept the wound total about even.

Now I had to take some risks this turn... that big squad of Crushers up top got Doomed by Eldrad, shot up, and then charged by the Banshees. They lost 1/2 their squad in this, but the Crushers didn't get away unscathed either. I also finished off that first Letter squad and moved my Dragon Serpent so the third Crusher squad couldn't charge into the scrum. The Guardian Serpent made a jump to mid-table in hopes of distracting him a bit and positioning them in case we ran out of time on 5 or something. Then we went into CC and the Scrum saw off the last Crusher there. This meant Eldrad and all those witchblade toting Warlocks could start throwing their attacks into the "softer" Letters...

TURN 5: Thirster 2 jumped my lines to eat the Fire Dragons while the letters took down the Dragon Serpent. The Crushers up there also finished off the Banshees... a painful sacrifice, but it kept them occupied for the turn needed. The Crushers on the right took the Guardian bait and double charged with the Letters to block th Serpent's rear hatch. But all those attacks meant a Pen 6 was almost inevitable. It Exploded, I lost some Guardians, and the squad was still free to play on my turn. But best of all, the Letters get beaten down by witchblades and I win combat by 10 wounds. Even the Thirster loses his last wound against that many rolls...

With the big Scrum ending at a perfect time, I see a golden opportunity to wreak more havoc. Eldrad and Co head north to wipe the last of the Curshers there and then spread out so the Thirster can't jump their line and contest the objective. The Dragon Serpent and Stormies finish the arc to isolate the 2nd objective. The Stormies unleash their fire on the Letters... and manage to kill all but one! Massed Flamer templates for the win, but it did gimp my plans to charge them. :-p Meanwhile the Farseer and Co hit the right Crusher unit to draw them away from the objectives as well as pin them in place. The Falcon got out of the Thirster's charge range... and then failed Night Fight to shoot it.

TURN 6: Then the last objective comes in. I have a 3/4 chance that it'd be somewhere easy for me to grab. But no, Fate has to be a fickle bitch and it pops right in the middle of his unit of Letters on the left. *sigh* Fortunately, the FarSeer and Co manage to hang on against the Crushers. The Council successfully frustrated the Thirster from jumping them, so it decides to drop a tank instead. It was Immobilized and Weapon Destroyed, but not dead. I'm not reseting the entire Vassal game just to fix this one item. :p

And the killing blow is applied. Tank Shock denies him the objective on the left. (I actually had my tank such that I probably had it in my favor, but it was questionable.) Then the Dragons pop that last Letter while the Stormies advance to grab the objective. I had two objectives solid, so even though the Crushers popped the Farseer it wouldn't have mattered if they Consolidated to contest. (They rolled a 1 anyways...)

Objectives: 2 Eldar, 1 Contested
Kill Points: 9 Eldar, 8 Daemons
Final Result: Massacre for the Eldar, with a bonus point for having more Scoring units in his deployment zone (2) than he had in mine (0).

Close, fun, nail-biting, and tactically challenging. This was a top-notch game, army and opponent.

Cheers and hope you've enjoyed the read. (And Alex, I haven't forgotten your question on Outflanking Genestealers...)

Monday, August 10, 2009

Sculpting 103: Simple Fills, Forms & Repairs


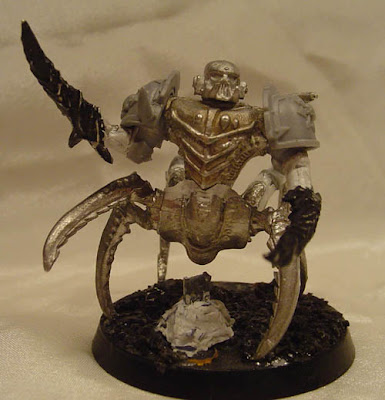
Hello everyone and welcome to another fun filled tutorial on Sculpting. For today's sample piece, we have the above Chaos Space Marine. Before anyone asks: NO THIS IS NOT A 'SARPEDON'. :-p I did this conversion before Soul Drinkers was even written. This guy was originally done up for the 3rd edition Chaos Codex to represent a Chaos Lieutenant with Daemonic Talons and Daemonic Speed. He was also my first experience with blue/white epoxy. It was such an "enjoyable" medium that I used the rest of it to fill gaps in terrain. I had to redo several pieces into Green Stuff too. Nowadays this miniature fields as a Chaos Lord with Daemon Weapon and then Steed of Slaanesh or Terminator Armour.
His abdomen and most legs are from an Epic Hunter-Screamer (also known as the RT era Carnifex), the torso is from a Phantom Titan, the arms from the metal Daemonettes, and the head and shoulder pads from Chaos Havocs.
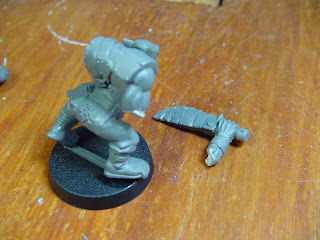
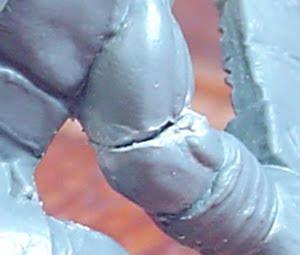
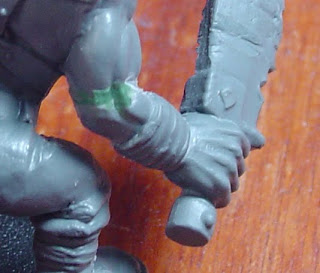
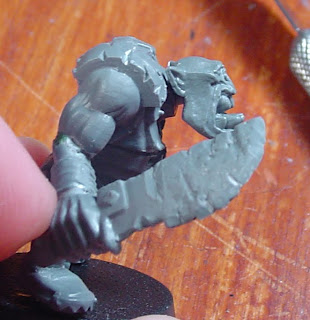
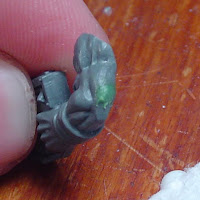
But enough of that... back to our Ork! Here Mr.Ork has been knocked from the gaming table, stepped on, played with by a 2-year old, and then had his arm broken for this tutorial too. It was not a clean break thanks to shearing torsion. The edges were ragged, twisted and had to be trimmed before he could be put back together. We could just slap him back together, knowing that glomming on the glue and paint will rarely get noticed in a field of hundreds of other Boyz. But think of the poor Ork... that's his Choppa arm. Take a long look into his beady, soul-less, piggy little eyes and ask yourself if you could really do such a thing.
So how do we fix him up right proppa? With Green Stuff! Because even an Ork knows that glue is not gap filler.

First up, we put him back together. The arm was rotated out and down a bit for look. Some trimming and cleaning of the edges was needed. I also pinned the joint for extra strength, more on this in a later tutorial. The arm was then glued into position.

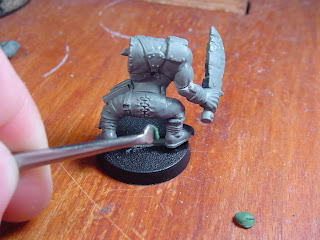
A small ball of Green Stuff was mixed and rolled out. This was a LOT more than needed. However, trying to mix less than this will just end up as a blue/yellow smear across the tips of your fingers. There's a number of ways to use the excess: doing multiple repairs at the same time, filling in the slot around a Slotta Base, sculpting small decorations, base work or any other reasons you might need Sculpy.

Next, use the blade of your sculpting tool to cut off a small piece of putty. If you have too little, you'll have to apply more and blend them together. If you have too much, you can work the excess away from the work area and then wipe it off the model. So it's usually better to have too much putty for the job rather than too little.

Scrape the putty off your knife so that it is generally where you want it. You will probably want to pause and wipe the blade off on a paper towel after this. A thin film or smear of putty will often adhere to the tip of your blade despite lubricant. This can build up and cause issues with smoothing and sticking. Take care of your tools and they'll take care of you.


Now flip your sculpting tool around and use the end that kinda looks like the head of a golf-club. This is your Smoother or Burnisher end. Make a guess what it's used for...
When shaping the putty, just pushing it into position is a good way to get it to stick to your sculpting tool. Instead, you want to use gentle sweeps of the smoother almost perpendicular to the crack to "draw" the putty down the line.
It is also easist to start in the center of the gap and shape the putty towards the ends. This will spread the putty more evenly and reduces the amount of cleanup needed along the edges.
When smoothing the putty, especially when thinning it at an edge or juncture, use a tight swirling motion to "polish" the putty down to shape.
The nicest thing about a small fill like this is that it is easy to follow the shapes of the original model. The plastic of the model will usually keep you from pressing in too deep and will guide your sculptwork.
As another note, I recommend starting out with organic models like Orks, Chaos or Tyranids... they are a little more forgiving towards small mistakes of shape, size, and smoothness.

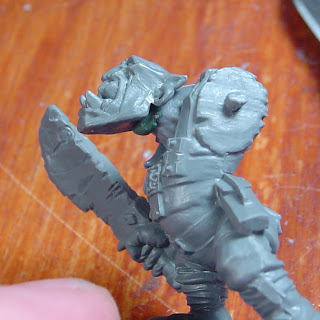
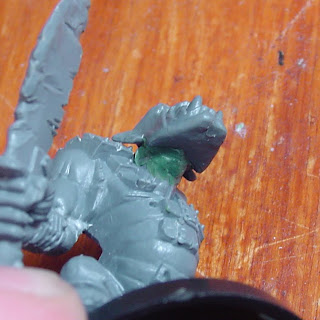
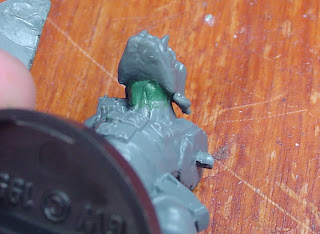
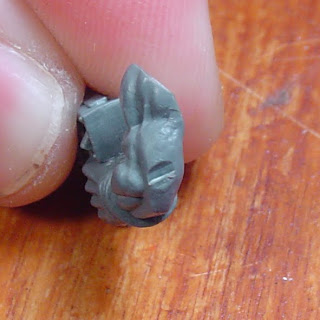
Now let's turn our eyes to a slightly more complex fill. The original model is looking at the ground maybe 5 meters in front of him. I wanted a model that was looking across the field at the enemy. Raising the neck like this caused quite a sizeable gap. So it was Green Stuff to the rescue again! It's almost like I'd planned this for a tutorial or something...

After fitting the two pieces to get an idea of how much putty I would need, I smooshed a glob of it into the neck area.

A bit of glue was then applied to the end of the head stem and it was pushed into place.

Using the same smoothing techniques as in a simple fill, the putty was worked from the center to the edges. A big thing to be aware of with this kind of fill: you're not working against as solid a backing. Newtonian physics applies and a strong push in from the left will cause putty to displace out the right. This is why you want to work gently and with oblique pressure.

Once the smooth shape of the neck was completed, a little more detail work was needed to pick out the throat muscles and larynx. I simply aligned the curve of the sculpting tool against the extant ligamenture, about 1.5mm down from the tip. The blade was canted at an angle and rocked into the sculpy, drawing down to create the lines going into the orgininal sculpt. The edge of the burnishing tool was then used to smooth and round the shaping and join. (Yes, I'm so OCD as to have sculpted details on the bottom of an Ork's neck...) A little more smoothing was also done to the sides of the neck and then the sculpt left to cure.

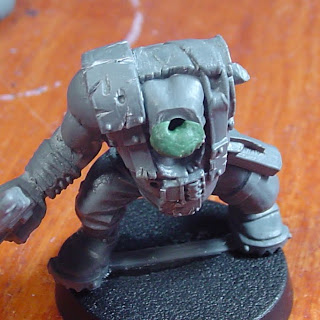
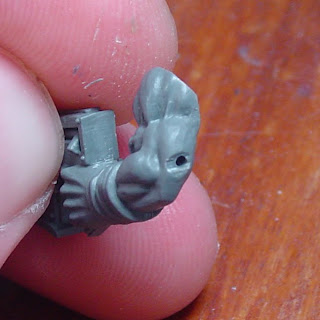
And this leads us to our third example... a simple raised form. This is where you're not really filling a gap between parts, but instead building up to repair a small detail that was miscast, clipped off the sprue poorly, chopped by an errant knife or otherwise mangled.
The trick with this repair is that it uses a very small amount of Green Stuff. Epoxy bonds to other epoxy very well, but not so much to plastic or metal in small amounts. There needs to be a decent amount surface area to adhere too, lest the finished product just flake off after curing.

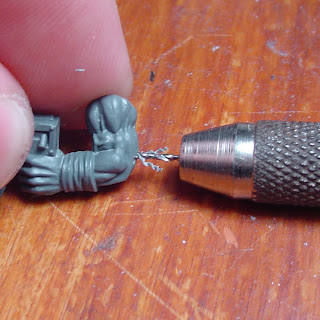
The solution is simple: a pin drill. The hole doesn't need to be that deep, only a millimeter or three.


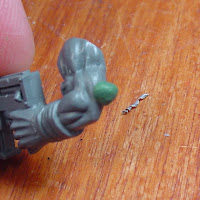
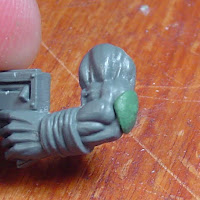
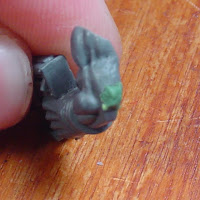
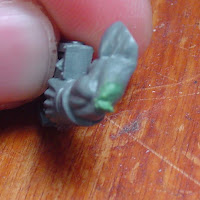
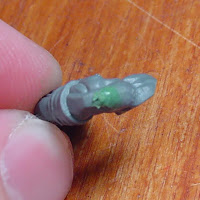
Now place a large ball of putty on the area. (Figure 1) Press it down slowly but firmly to fill into the hole. (Figure 2) Then use the blade edge of your tool to trim the excess away from the area. (Figure 3) Do this by pushing the edge into the putty to cut it and then scraping away from the center mass. You will want to make sure your blade is well lubricated so that you don't accidentally pull the putty off during this. The final result should be a rhombus in the general shape and quantity needed.

A raised fill is trickier than a recessed fill because you don't have the edges of the gap to keep you from pushing too far in. Put too much pressure on a raised feature and you'll just smoosh the whole thing flat. With the semi-solid nature of putty, trying to push a feature back up is often a frustration of creases, folds, slippage and bad words. It will often be easier to just wipe the putty off and apply a fresh ball. To avoid this, just use the same draw and burnishing techniques as above... with more care for depth.


The big thing this changes is where you start your sculpt from. You can start from the depths and push everything up to higher areas... have fun with that. Or you can start from the highest points and draw the putty down to where you need. (Figure 1) Any excess putty gets worked down and away from the main sculpt. (Figure 2) Once you have it sufficiently thinned, you can scrape it off the model. (Figure 3) Any loose ends or scrape marks can then be burnished smooth.

Whew... made it all this way or did you just skim? :-p Hopefully this has been an interesting and informative tutorial. Next Week: "Sculpting 201: Pinning, Armature, and Large Shapes". Cheers!