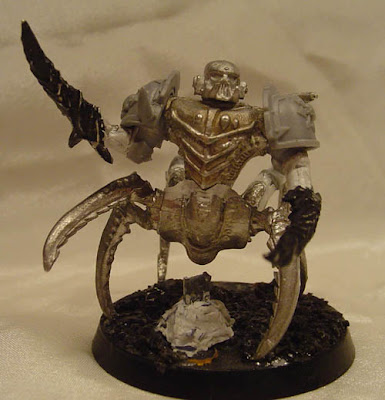
Hello everyone and welcome to another fun filled tutorial on Sculpting. For today's sample piece, we have the above Chaos Space Marine. Before anyone asks: NO THIS IS NOT A 'SARPEDON'. :-p I did this conversion before Soul Drinkers was even written. This guy was originally done up for the 3rd edition Chaos Codex to represent a Chaos Lieutenant with Daemonic Talons and Daemonic Speed. He was also my first experience with blue/white epoxy. It was such an "enjoyable" medium that I used the rest of it to fill gaps in terrain. I had to redo several pieces into Green Stuff too. Nowadays this miniature fields as a Chaos Lord with Daemon Weapon and then Steed of Slaanesh or Terminator Armour.
His abdomen and most legs are from an Epic Hunter-Screamer (also known as the RT era Carnifex), the torso is from a Phantom Titan, the arms from the metal Daemonettes, and the head and shoulder pads from Chaos Havocs.
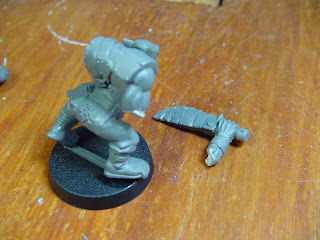 But enough of that... back to our Ork! Here Mr.Ork has been knocked from the gaming table, stepped on, played with by a 2-year old, and then had his arm broken for this tutorial too. It was not a clean break thanks to shearing torsion. The edges were ragged, twisted and had to be trimmed before he could be put back together. We could just slap him back together, knowing that glomming on the glue and paint will rarely get noticed in a field of hundreds of other Boyz. But think of the poor Ork... that's his Choppa arm. Take a long look into his beady, soul-less, piggy little eyes and ask yourself if you could really do such a thing.
So how do we fix him up right proppa? With Green Stuff! Because even an Ork knows that glue is not gap filler.
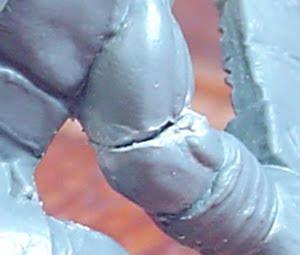 First up, we put him back together. The arm was rotated out and down a bit for look. Some trimming and cleaning of the edges was needed. I also pinned the joint for extra strength, more on this in a later tutorial. The arm was then glued into position.
 A small ball of Green Stuff was mixed and rolled out. This was a LOT more than needed. However, trying to mix less than this will just end up as a blue/yellow smear across the tips of your fingers. There's a number of ways to use the excess: doing multiple repairs at the same time, filling in the slot around a Slotta Base, sculpting small decorations, base work or any other reasons you might need Sculpy.
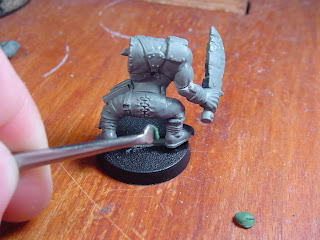 Next, use the blade of your sculpting tool to cut off a small piece of putty. If you have too little, you'll have to apply more and blend them together. If you have too much, you can work the excess away from the work area and then wipe it off the model. So it's usually better to have too much putty for the job rather than too little.
 Scrape the putty off your knife so that it is generally where you want it. You will probably want to pause and wipe the blade off on a paper towel after this. A thin film or smear of putty will often adhere to the tip of your blade despite lubricant. This can build up and cause issues with smoothing and sticking. Take care of your tools and they'll take care of you.
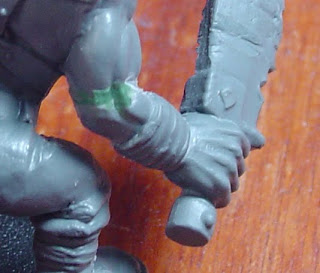 Now flip your sculpting tool around and use the end that kinda looks like the head of a golf-club. This is your Smoother or Burnisher end. Make a guess what it's used for...
When shaping the putty, just pushing it into position is a good way to get it to stick to your sculpting tool. Instead, you want to use gentle sweeps of the smoother almost perpendicular to the crack to "draw" the putty down the line.
It is also easist to start in the center of the gap and shape the putty towards the ends. This will spread the putty more evenly and reduces the amount of cleanup needed along the edges.
When smoothing the putty, especially when thinning it at an edge or juncture, use a tight swirling motion to "polish" the putty down to shape.
The nicest thing about a small fill like this is that it is easy to follow the shapes of the original model. The plastic of the model will usually keep you from pressing in too deep and will guide your sculptwork.
As another note, I recommend starting out with organic models like Orks, Chaos or Tyranids... they are a little more forgiving towards small mistakes of shape, size, and smoothness.
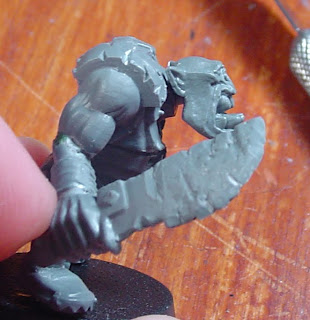 Now let's turn our eyes to a slightly more complex fill. The original model is looking at the ground maybe 5 meters in front of him. I wanted a model that was looking across the field at the enemy. Raising the neck like this caused quite a sizeable gap. So it was Green Stuff to the rescue again! It's almost like I'd planned this for a tutorial or something...
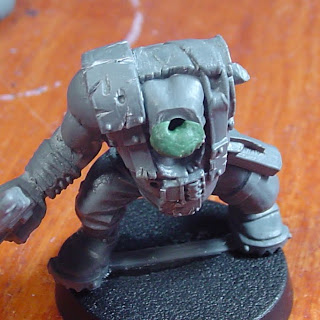 After fitting the two pieces to get an idea of how much putty I would need, I smooshed a glob of it into the neck area.
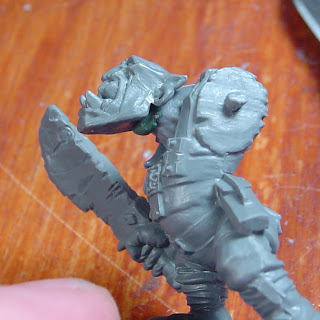 A bit of glue was then applied to the end of the head stem and it was pushed into place.
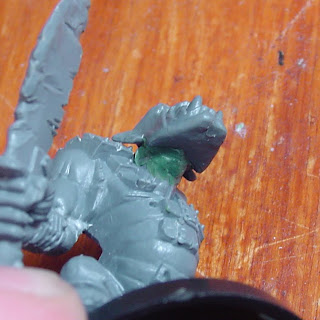 Using the same smoothing techniques as in a simple fill, the putty was worked from the center to the edges. A big thing to be aware of with this kind of fill: you're not working against as solid a backing. Newtonian physics applies and a strong push in from the left will cause putty to displace out the right. This is why you want to work gently and with oblique pressure.
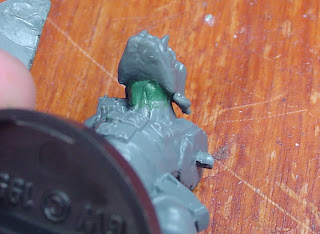 Once the smooth shape of the neck was completed, a little more detail work was needed to pick out the throat muscles and larynx. I simply aligned the curve of the sculpting tool against the extant ligamenture, about 1.5mm down from the tip. The blade was canted at an angle and rocked into the sculpy, drawing down to create the lines going into the orgininal sculpt. The edge of the burnishing tool was then used to smooth and round the shaping and join. (Yes, I'm so OCD as to have sculpted details on the bottom of an Ork's neck...) A little more smoothing was also done to the sides of the neck and then the sculpt left to cure.
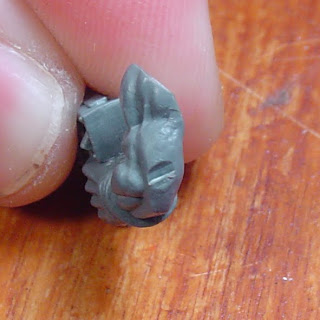 And this leads us to our third example... a simple raised form. This is where you're not really filling a gap between parts, but instead building up to repair a small detail that was miscast, clipped off the sprue poorly, chopped by an errant knife or otherwise mangled.
The trick with this repair is that it uses a very small amount of Green Stuff. Epoxy bonds to other epoxy very well, but not so much to plastic or metal in small amounts. There needs to be a decent amount surface area to adhere too, lest the finished product just flake off after curing.
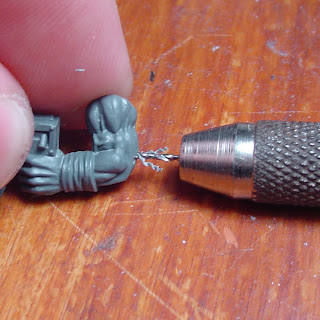
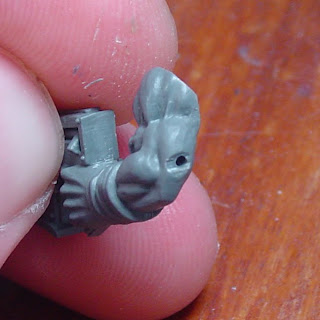 The solution is simple: a pin drill. The hole doesn't need to be that deep, only a millimeter or three.
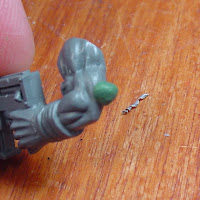
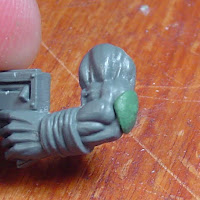
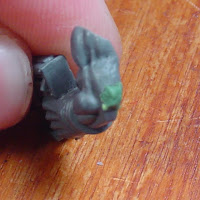
Now place a large ball of putty on the area. (Figure 1) Press it down slowly but firmly to fill into the hole. (Figure 2) Then use the blade edge of your tool to trim the excess away from the area. (Figure 3) Do this by pushing the edge into the putty to cut it and then scraping away from the center mass. You will want to make sure your blade is well lubricated so that you don't accidentally pull the putty off during this. The final result should be a rhombus in the general shape and quantity needed.
A raised fill is trickier than a recessed fill because you don't have the edges of the gap to keep you from pushing too far in. Put too much pressure on a raised feature and you'll just smoosh the whole thing flat. With the semi-solid nature of putty, trying to push a feature back up is often a frustration of creases, folds, slippage and bad words. It will often be easier to just wipe the putty off and apply a fresh ball. To avoid this, just use the same draw and burnishing techniques as above... with more care for depth.
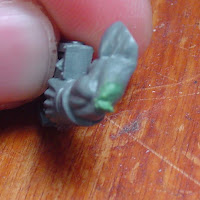
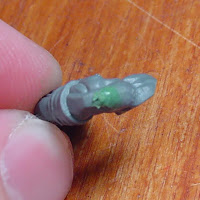
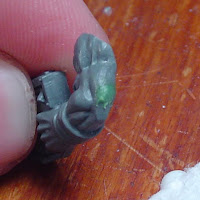
The big thing this changes is where you start your sculpt from. You can start from the depths and push everything up to higher areas... have fun with that. Or you can start from the highest points and draw the putty down to where you need. (Figure 1) Any excess putty gets worked down and away from the main sculpt. (Figure 2) Once you have it sufficiently thinned, you can scrape it off the model. (Figure 3) Any loose ends or scrape marks can then be burnished smooth.
Whew... made it all this way or did you just skim? :-p Hopefully this has been an interesting and informative tutorial. Next Week: "Sculpting 201: Pinning, Armature, and Large Shapes". Cheers!


Good stuff, to be sure.
ReplyDeleteThe motions are important, but something you might pick up with trial and error. At least, I did.
What I found most interesting was the tail end of it. I hadn't considered the use of drilling a small hole in there, but I can see how that would indeed make a difference.
Your preparation of the model was by far the most entertaining part of the article.
Keep up the good stuff, man.
Thanks for another great tutorial. They've been greatly appreciated.
ReplyDeleteAhhh the old CHaos Lord conversion, I got to giggle when I saw he hasnt gotten any paint yet- as I have several conversions just as old and just as paintless!
ReplyDeleteNice addition to the tutorial :)
@Raptor1313: I'm not certain I get you comment about the preparation of the model. The deliberate "mistakes" that I'm fixing up or the running commentary?
ReplyDelete@Rkik: Thanks!
@MoM: Actually, that's just the old pic. He's gotten painted, detail work and based. :-p I was just too lazy to take a new pic.
The stuff you did to break the model was comical. It might be me, but I'm always for adding a little bit of extra comedy here and there into writings when possible or appropriate.
ReplyDelete